Friday, May 28, 2010

Jedi Robe

My son loves those hooded bath towels.  And he loves Star Wars. 
So I made him a 'Jedi Robe'.... and he LOVES that too!

(I apologize for the sideways picture, Blogger and I are not getting along today)
I found pictures of an Imperial Walker, the Death Star and R2D2 (at my son's request)... 
cut them out of a cheap white fleece blanket from IKEA that was being ignored in my home and sewed them on the towel.
The hood is a hand towel - cut in half and then sewn on.

Here is my son trying his best to ignore the camera.
He really does love his Jedi Robe.  He wears it even when it's not bath time.

I wonder what type of robe I'll make next... fire fighter?  dinosaur?  pirate?  astronaut?  
The possibilities are endless.  Give it a try.  Your kids will LOVE it!

Thursday, May 27, 2010

High Chair Straps

 My mom has this darling high chair.  But it has no straps.  
When ever we go over there, we've just used a belt to keep the kiddos strapped in.
The problem with that is they slide out the bottom.
So I found a solution...
 

 I measured the high chair and cut out the material to fit over the top.
Then I sewed two really long strips of material that would come from behind the chair, go under my baby's bum, up between his legs and tie in the back.  
(Did that make sense?  I can draw a diagram if anyone is interested.)


It works perfect!  When it's dirty, throw it in the wash.

Saturday, May 8, 2010

Dumpster Diggin'

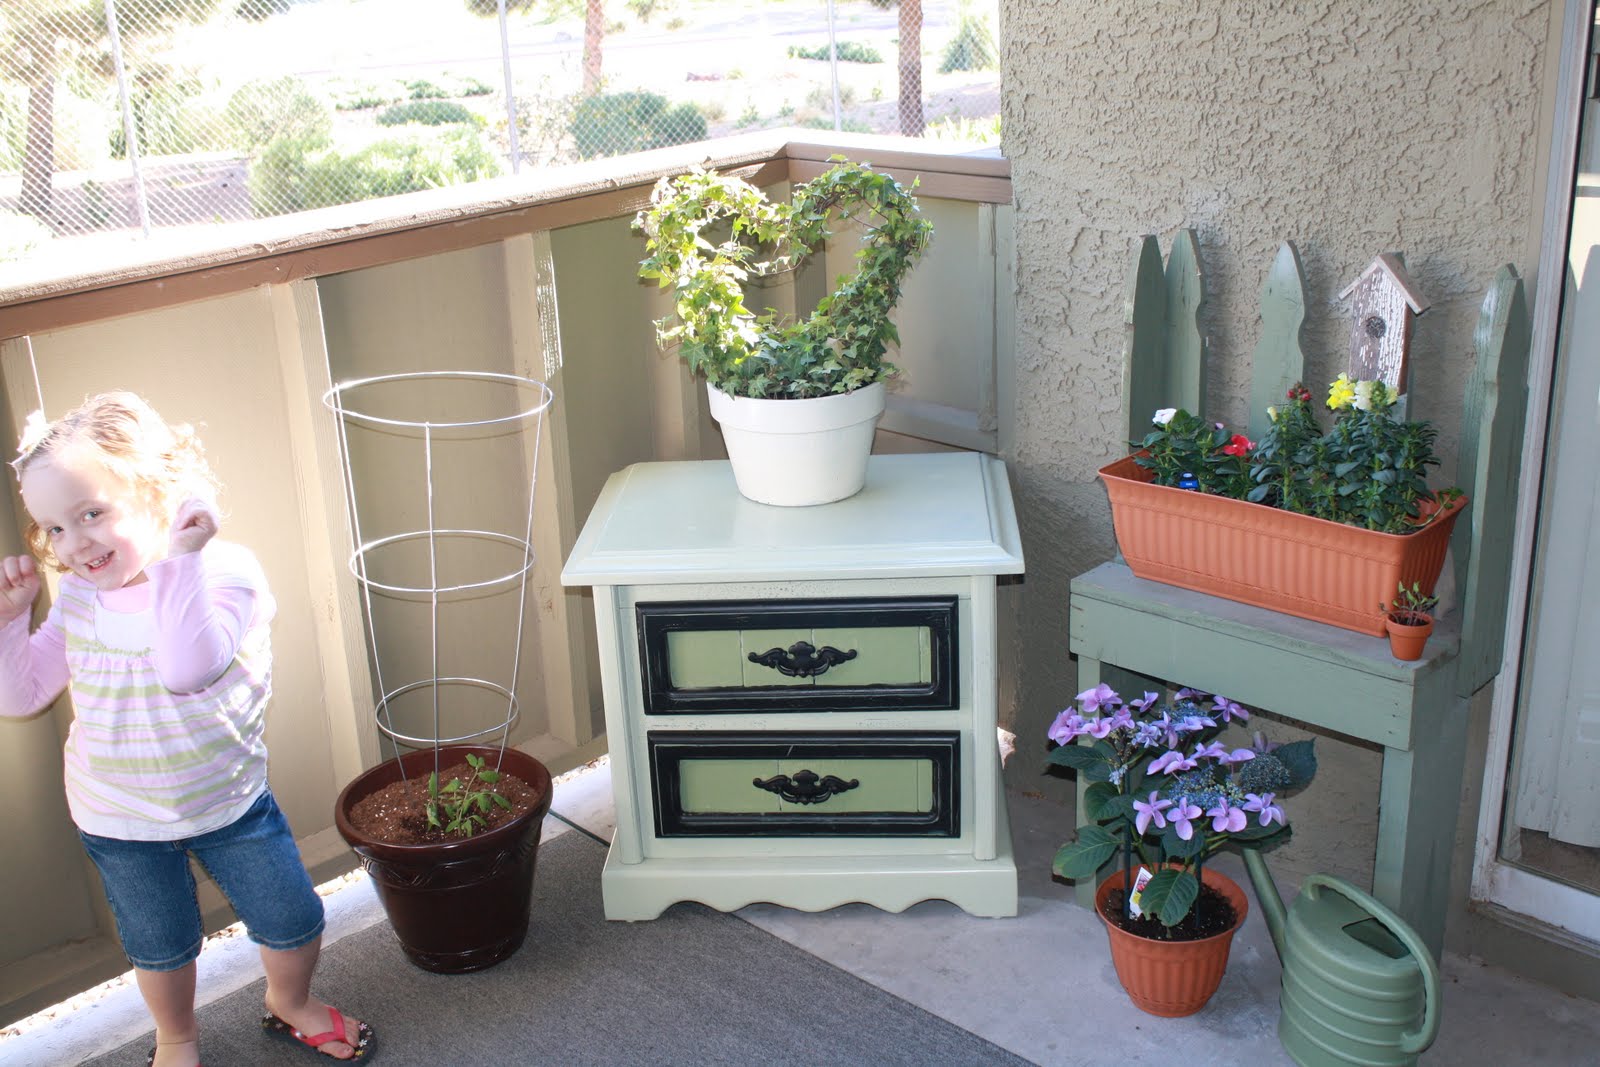
A few weeks ago I pulled into our parking area and saw something on top of the trash, I walked closer and saw this beauty... isn't she lovely? OK well I knew she COULD be lovely. When my hubby got home from work I asked him to go grab it for me. He wasn't fond of the idea but he did it anyway (THANKS JAY!) It wasn't like he had to go digging for it- the trash was full and it was sitting on top. It needed a good cleaning and a little sanding and a fresh coat of paint and she would be beautiful.

I turned her into a plant stand for my porch. I don't have anymore room in my small apartment for more furniture. The drawers were a little crooked and it's a little wobbly, and I didn't feel like fixing it up perfectly. This will do just fine! The drawers now hold my gardening items and a few outside toys for my daughter- PERFECTION! And only cost me $3.00 for a can of spray paint (Krylon, Celery).

Friday, May 7, 2010

Denim!

I have a super crafty friend, Carolyn.  She made all of these bags/purses out of old jeans.

Aren't they darling?!  LOVE them!

They inspired me to create something out of my old denim...

So I started cutting.  (I"m not big on patterns... I tried to make a pattern, 
but it wasn't working... so I just started creating)


I decided on a cute pirate lining.  My boys love it!


And now I have a new diaper bag!
I should have taken more pictures... but it's hard to photograph the inside of a bag.
There are pockets on both of the outside panels.  Pockets on the inside.
A zipper pouch in the middle - as a dividing section of the bag.
And I sewed in elastic loops to hold sippy cups or bottles.

It was fun to create something new out of something that would 
usually be thrown out or sent off to the local DI.

Thanks for the inspiration Carolyn! 

Thursday, May 6, 2010

Sunshine Award!

We are so honored to receive the Sunshine Award from Oh my heck this is so cute! 
Melinda has such a darling, classy blog.  You've GOT to check it out!


Rules for the Sunshine Award Recipients:

1. Put the logo on your blog or within your post.
2. Pass the award on to 12 other bloggers.
3. Link the nominees within your post.
4. Let the nominees know they have received this award by commenting on their blog.
5. Link back to the person from whom you received this award.


The Crazy Crafty Cousins would like to pass the Sunshine Award on to:
We love her style!  And doesn't this chicken look so tasty?!

There are too many yummy recipes on this site... jump over there and try one out!

How creative is that?!  Love it! 
Ok, so dang cute!  My boys would love these!
Can't wait to try them out! YUM!
Oh my weakness... homemade tortillas.
I'm drooling.
Such fun and easy crafts! 
I'm a sucker for a yummy Chicken Salad recipe... add pasta into the mix, and I'm sold!

 Don't you just LOVE this idea?!  Can't wait to try it out!


 This blog just makes you happy!  
And it makes me want to start planning my next trip to 
The Happiest Place on Earth!

Thanks again for the Sunshine award!
Please jump over and check out these blogs!  You'll be amazed and inspired!
Leave a comment, become a follower... everyone needs a little love!

Monday, May 3, 2010

Just a shout out

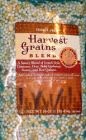
This isn't anything crafty, but I'd like to send a shout out to my cousin, Jodi who told me about this product from Trader Joes (you think I would have known about it since my hubby works there, oh well) This stuff is awesome and a better alternative to plain rice as a side dish. And it is still way easy to prepare. My 3 year old asked for seconds the first time I made it.Click--> to read some reviews about this product Harvest Grains Blend has couscous, orzo, baby garbanzo beans and red quinoa

I made it as a side dish to grilled chicken one night- delish! So if you live by a Trader Joe's go and pick up a bag. I know it's less than $3.00 a bag.

Sunday, May 2, 2010

Breakfast Casserole in a crock pot

Great for early breakfast when you have guests and want to sleep in a little...

Ingredients:
1 doz eggs
1 cup milk
1 bag (32 oz bag) frozen hash brown potatoes
1 lb bacon, cooked crisp - or Ham (other meat will work as well)
3/4 cup chopped sweet onion
1 1/2 cup cheese - shredded (cheddar, jack, or both)
salt and pepper
garlic powder

Directions:
1. Spray inside of crock pot with nonstick spray.
2. Layer potato, bacon, onion, cheese 1/3 of each 3 times.
3. In a large bowl, beat eggs with milk and seasonings.
4. Pour egg mixture over the ingredients in the crockpot.
5. Cook on low 10 - 12 hours, until eggs are set and thoroughly cooked.

Suggestions:It needed a little extra kick, next time might add some green chilies or salsa)

**Made great Breakfast Burritos the next day!
(sorry no, no pictures - forgot about it until everything was all put away)

Oatmeal Chocolate Chip Cookie

 (this is the best recipe I've found - I've made a few tweeks that I think made them even better)
Ingredients:
1 cup (2 sticks) butter
1 cup brown sugar
1 cup white sugar
2 eggs
1 tsp vanilla
1.5 cups white flour
1 tsp baking soda
1/2 tsp salt
3 cups oatmeal
2 cups chocolate chips (I use 1 cup semi or milk chips and 1 cup white chips)
1/2 cups cinnamon chips (adds extra kick of flavor)
option - add 1/2 cup walnuts (my personal favorite)


350 degrees Fahrenheit

Mix sugars and butter together. Soften the butter before hand. (You can microwave the butter but it just doesn't work out as well).  Add eggs and vanilla, mix.  Mix in flour, salt and baking soda.  Mix in the oatmeal.  Stir in chocolate chips, cinnamon chips, and optional nuts.
The finished dough won't look like your typical non-oatmeal dough since there's less flour in it.  Bake for 10-15 minutes. - Original recipe states to take the cookies out before they look totally done (usually around 12 min), leave them on the sheet for 3 to 5 minutes then remove to flat surface to cool.
Enjoy!

Wednesday, April 7, 2010

Anniversary Paprika Chicken and Anniversary Pasta

This post is from Alisa... I'm just posting it for her.  ;)

Someone else already posted an "Anniversary Chicken", but this is an "Anniversary Paprika Chicken" recipe we tried last night and really liked it!!
(Picture and recipe from here.)

Anniversary Paprika Chicken

4 boneless chicken breasts
1/2 c. parmesan cheese
1 1/2 c. italian bread crumbs
1 1/2 cubes (3/4 cup) melted butter
Paprika (I forgot to put the paprika in, but we still really liked it!)

Combine parmesan cheese with breadcrumbs.  Dip chicken breast in melted butter.  Roll in crumb mixture until completely coated.  Place in baking dish and sprinkle with paprika.

Bake uncovered for 35-40 minutes at 375 degrees.  Do NOT overcook!


And it tasted so good with Anniversary Pasta!! (recipe can be found here.)

Anniversary Pasta

1 pkg bow tie pasta
1/2 c. (1 cube) butter - the real stuff
2-3 cloves garlic, minced
3/4 c. grated parmesan cheese
1-2 chicken bouillon cubes
1 pint heavy cream
Salt and Pepper to taste
10-15 spears asparagus, blanched
1/2 c. bacon, crumbled
1/4 c. toasted pinenuts (or to taste)
Parsley, to taste
Parmesan cheese, to taste

Boil bow tie pasta in salted water until al dente.  Do NOT overcook.

In wok or heavy skillet, melt butter.  Ad minced garlic and saute a minute or so.

Add parmesan cheese and bouillon cube(s).  When the bouillon cube is dissolved, slowly stir in heavy cream, salt and pepper.

Add cooked pasta to cream sauce and toss until pasta is well covered.

Add blanched asparagus.  Sprinkle with crumbled bacon, toasted pinenuts, parsley and parmesan cheese.  Toss together.  Serve immediately.

Tuesday, April 6, 2010

Breakfast on the go...

Breakfast can be a crazy time.  In my house, sometimes it gets skipped all together (for the adults).  
 So, I thought I would share a trick that we've learned.

Last Saturday morning I made breakfast burritos for the family.  While I was at it, I made 5 extra.
I wrapped them in a paper towel, then in a layer of foil, placed them in a freezer bag and 
put them in the freezer.

When you want to eat one, remove from freezer, remove layer of foil (leave the paper towel) and 
microwave for about 2 minutes.  
There you go!  A ready made breakfast.  

I usually put scrambled eggs, sausage, onions and maybe a green pepper in my burritos... 
but add whatever makes you happy!

Saturday, April 3, 2010

Fun, easy activity for kids

My son and I made this with a some pipe cleaners a few eyes.
It's a bunny and a turtle... I case you're wondering.  ;)

Cheap entertainment... that's what it's all about some days!

Friday, April 2, 2010

Easter Countdown

A little late for this Easter... but maybe you can do this next year.

My son loves holiday countdowns.
I did a Google Images search and found some Easter Eggs to color.
We cut them out and taped them together.
So easy!

Thursday, April 1, 2010

S-P-R-I-N-G

I had a lot of fun working on this project and plan on doing more for other holidays.
  1. go to a hardware store, have some wood blocks cut, sand edges
  2. stain your wood blocks
  3. choose background paper for each block
  4. mod podge paper on to individual blocks
  5. sand the edges again so the paper smoothly blends in to the wood
  6. cut out letters and mod podge on (i used my cricut, but you can buy lettering at a craft store)
  7. embellish as you please!

Tuesday, March 30, 2010

Easter tulips

I found this idea from here. I thought it was really cute and easy and I knew I couldn't kill these flowers oh and I had all the supplies at my house.
I found some matching spring scrapbook paper in my stash, traced the template and cut out the flowers. Glued them on to my skewers (I wrapped mine with floral tape) I bought these metal baskets last year from Tai Pan, so I stuck some styrofoam in the bottom and arranged my tulips. I had planned on putting some green Easter grass inside but can't find where I put it- so that will be added later.

Oh look who found a home finally, my Easter mickey antenna ball!
(our cars antenna is too big so I try and find different places to put them) I think he'll stay here for a while

Now I'm off to find the green grass- I hate when the Easter bunny shops early!!!


Minnie t-shirts

We just returned from a family trip to Disneyland. We LOVE Disney (a lot)! My nieces hadn't been in a few years so I thought I would do something special for them and my daughter to wear to the park. It was so simple, and they got a ton of compliments (and a TON cheaper than buying shirts in the park)
I found some coordinating fabrics (thanks to Walmart), cut a mickey head shape out of each fabric then ironed it on to some wonder under (fusible fabric). Then ironed them on to the t-shirts. Made a simple bow and hand stitched them on to the shirts and added a button in the middle. I think each shirt might have cost me $6.00 each to make!!
Look how HAPPY and CUTE they are wearing their shirts!

Wednesday, March 10, 2010

Simple wall decor

I saw this idea months ago, on several blogs.
I decided it was perfect for one of my many empty walls.
I found a font that I liked, printed the letter H as my template, cut the fabric and done!
So easy.


P.S. As a side note... the blog will probably be a 'work in progress' for some time. It's proving to be very difficult to work through the html code while juggling the kiddos.
Someday it will be done... someday. ;)

Friday, February 26, 2010

C-A-K-E-S

I was going through pictures on my computer and saw a lot of cakes I have made that never made it on here. Here's some cakes I have made in the past year.
The most recent were these football cupcakes we had for Super Bowl Sunday, I found the picks at the Target dollar section and knew I had to have them and these cupcakes were perfect.
My nieces 1st birthday cake, a VERY easy butterfly cake. With Valentine m&m's, upside down Hershey kisses, and twizzler antenna's
This next one is a picture of Claire's 2ND birthday cake from her birthday party in California
(bought from Albertsons) So I took the pieces home and made it for her actual birthday 2 weeks later and it turned out like.... this.....

My nieces 8TH birthday cake, my favorite part were these candles. I saw them in a magazine a few months ago (can't remember which one, sorry) The 'recipe' says to use the froot loop straws which come in different colors, but we could not find them anywhere. So we settled for golden oreo straws. And gum drops shaped to be the flame. Then frosting drips for the candle wax.

My sister's wedding cake. The top cake was my first homemade fondant experiment. It turned out well until the very end where it ripped in 2 places, so I used 2 bands of the brown ribbon to cover it up.

Basketball cupcakes because my husband is a March Madness freak!!

And this one was such an easy and fun idea. It was for my cousin Josh's wedding, his then fiance told me about the idea and I loved it. I love the top view!

And here's the final product with 200 cupcakes!!


Tuesday, February 16, 2010

Kalua Pig

This recipe is my sister, Jodi's.
It is FABULOUS! (and super easy!) And it's my husband's favorite!
So tender and moist... you're gonna love it!

Kalua Pig

1 Boneless Pork Roast

Stab roast with large fork or knife, making holes all over the roast.

Rub:
1 1/2 t. liquid smoke
2 1/4 t. sea salt


Rub all over roast. Wrap roast in 3 layers of foil. Do NOT wrap the roasts tightly like you would a baked potato. DO wrap it more tented like you would a foil dinner. Make sure the foil is sealed tightly at the edges.

Place roast in a crock pot and cook on low for about 8 hours. Use a meat thermometer to make sure the eat is cooked all the way.

When the roast is done, empty the roast and all the drippings into the crock pot, removing the aluminum foil. Shred the meat and add 1/2 c. of water.

Leave the meat in the crock pot on a 'warm' setting until it is time to serve.

Serve over rice.

Fire Truck Birthday Party


My baby just turned 1. (where does the time go?!)
We had a fire truck themed party.

I made this banner in Photoshop, printed it out on card stock,
strung it together with thread, and taped it onto candy sucker sticks.
I love how it turned out!


The cupcake toppers were created in Photoshop, printed on card stock and taped onto candy sucker sticks. So easy and a perfect way to dress up a cupcake.